Article: 10 Craft projects to get your child excited for back to school

10 Craft projects to get your child excited for back to school
It’s that time of year again – back to school season! As you’re making the rounds buying school supplies and books, why not also pick up a fun project for your child to do that’ll get them super excited to return to the classroom? We’ve come up with 10 activities to do just that.
1. Make friendship bracelets
Is your child looking forward to seeing some of their friends again this upcoming school year? Inspire your child to create friendship bracelets they can give to their friends when they see them again!
Friendship bracelets are traditionally made by weaving string into various patterns, but we recommend a simpler approach – using beads. Simple beaded bracelets are much easier and faster to make, and you can use lettered beads to create the names of your child’s friends or a favorite saying.
To get started making simple beaded bracelets, we suggest reading this blog for tips.

2. Diamond paint keychains or bookmarks
Decorating and personalizing your backpack is always fun and keychains are a great way to do that. Encourage your child to explore new crafts and personalize their backpack by creating a diamond painted keychain! Or, if they aren’t keen on keychains, create a diamond painted bookmark for all the reading they will be doing.
Diamond painting is the craft of gluing small jewels to a piece of plastic or paper to create a pattern or image. It’s paint-by-numbers without the mess and creates a sparkly product kids are sure to love.
To learn more about diamond painting, take a look at this blog post by Paint With Diamonds.

3. Decorate a pencil pouch
Your child has to keep their pencils and school supplies somewhere – why not a pencil pouch they decorated themselves? Seeing their own favorite images and ideas while they’re at school is sure to bring them some comfort and joy.
We recommend fabric markers as they are easy to use and reduce the mess paints tend to have. A simple white cotten pencil pouch is the perfect canvas. You can provide your child with stencils, or let them run wild free hand! The possibilities are endless.
For more fabric marker inspo, check out this blog post here.

4. Make your own hair accessories
For the first day back to school, it’s fun to wear something special – maybe something your child made! There are a lot of child-friendly ways to make hair accessories. One of our favorite methods is gluing charms, ribbons, and fabric to a headband to create a unique piece.
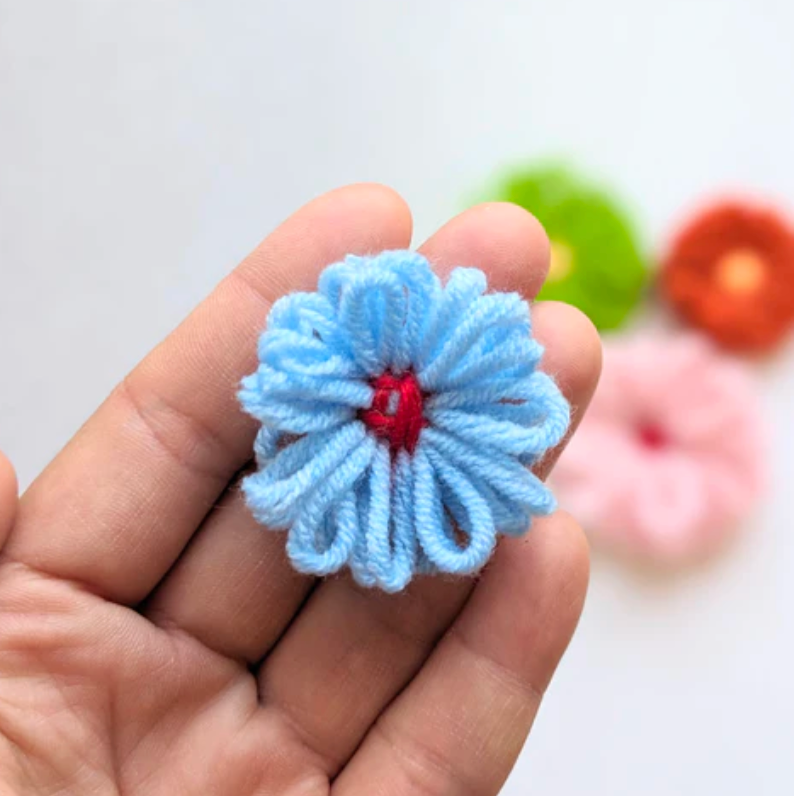
Children can also create their own hair clips by gluing charms to simple barrettes, or creating yarn flowers to attach to clips. Yarn flowers can be easily made on a loom (either bought or created at home using cardboard), which can be used over and over again for endless fun! Read here to learn more about creating yarn flowers.

5. Decoupage a notebook cover
Some notebooks can have bland, solid color covers that don’t excite your child about school. Instead of settling for a basic cover, you and your child can create a personalized notebook cover to make taking notes a little more enjoyable.
We recommend decoupage as a fun way to decorate your notebook cover. Decoupage, similar to collage, is the layering of paper and stickers to create designs. The only difference between the two is decoupage is used on objects that will get practical use – like a notebook!
Children can incorporate their favorite images, TV shows, characters, friends, and more to customize their notebook! Here’s a great article to get you started with decoupage.

6. DIY original buttons
Looking for another way to customize a backpack or clothing? How about making your own buttons! This is a surprisingly simple activity with the help of a button maker.
Your child can draw their own images or take clippings from magazines, wrapping paper, photographs, and more and turn them into their very own button. While a button maker is a bit more of an upfront cost than our other projects, once you have a button maker your child can spend hours making all the buttons they want!
To learn more about button makers and how they work, you can visit this article here.

7. Create a potholder bag
Is your child a fan of bags or purses? Why not make their own! With the use of a potholder loom, you can create colorful potholders as a beginner weaver. These looms are a great way for kids to be introduced to this ancient artform!
By weaving two potholders, sewing them together, and then connecting them with a strap, you can create a simple over the shoulder bag! How fun is that? You can read more here about how to use a potholder loom. 
8. Make a rubber band loom bracelet
Here’s another fun and unique accessory you can make at home – a rubber band loom bracelet! These bracelets are made by weaving together small rubber bands to create fun patterns and shapes. They’re easy to learn how to make, and there are plenty of patterns and varieties to create at different difficulty levels.
To get started, you’ll need a set of small rubber bands and a loom to go with it. Before you dive in, here’s a great resource of bracelet patterns you can make and how to make them. Have fun!

9. Create a name plate using string art
Maybe it’s time to change up some of the decorations in your child’s room or study space. Creating fun and colorful art to hang on the wall or prop on their desk is a great way to liven up study time. String art can be a great craft to try with your child. We always enjoy using string art to create a name plate in a cool array of color and shape.
String art is the practice of using pins and string to create shapes. The pins are placed on a corkboard to create a shape, and the string is wound around the pegs to fill in the shapes with color. You can use stencils to create your pin shapes, and then decorate those shapes with string.
Here’s a blog where you can learn more about how to get started with string art.

10. Personalize figurines with pour art
It can be fun to have a cute figurine or trinket for your child to take to school and decorate their desk with. Why not make it a trinket they decorated themselves? Enter pour art!
Pour art is the artistic process of layering paint in a cup before pouring the paint out and onto your object of choice – whether that be a 3D object or canvas. We love doing this with rubber duckies to create fun patterns on a cute shape! This is fun but also a little messy, so we recommend putting down sheets of paper on a table and using a tray to catch any excess paint.
If your child wants more keychains, you can also use this method to paint and personalize a keychain bear or other object, too!
For more information on getting your child started with pour art, we suggest this blog post.

—
We hope we’ve inspired you to try a new creative activity with your child! If you’re looking for a fun space to do crafts, you might be interested in our open studio space, where you can make anything, anytime. Furthermore, if you like a more instructional approach, we offer workshops for kids, teens, and adults alike!
We wish you the best of luck for this school year, and hope to see you around. Til’ then, keep crafting!

